Hello I wanted to show you this fun window card that I made using the partial die-cutting technique!
First I cut out a piece of patterned cardstock to 5.5" x 4.25". With a pencil I drew lines on the top and sides of the cardstock as a guide for the windows. The lines are approximately .5" from the edge of the paper.
Next I cut the top two windows using the rectangle from the "Pocket Pieces Hi" die set aligning the die with the guide lines I drew, making sure the short side of the rectangle is on the top.
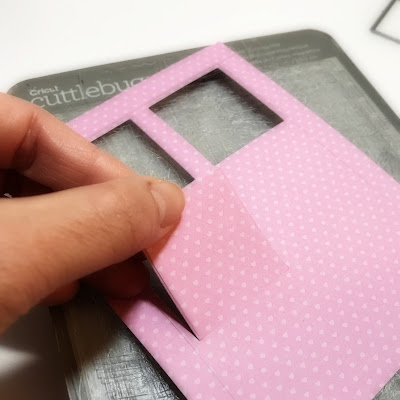
I cut the third window using the partial die-cut technique. Because I want to use the "Hi" sentiment die on the bottom of the window, I'm aligning my cutting plates so that it doesn't cut the bottom of the rectangle. There's several ways to do this, but I like to stack my top plate with where I want the pressure for the die to cut as shown in the picture below:
I run them all through my die-cutter and voila! A partially cut rectangle! Exciting right? ;)
I use the partial die-cutting technique for this next step as well. I align the "Hi" die bottom slightly below the rectangle's bottom. Again, I align the cutting plates to avoid pressure on the bottom of the die, so that it won't cut the bottom of the sentiment and run it through my die-cutter.
Then I use a ruler and a craft knife to cut out the bottom of the rectangle, leaving the "Hi" sentiment in tact and then I erased all the guide lines.


Next, I used the scallop die from the Outdoor Landscape 2 die set to add a scalloped trim to the bottom of the cardstock.
For the card base, I blended some distress ink to add some color to the windows.
I stamped and fussy cut the adorable unicorns from "Sparkle" stamp set and colored them with alcohol markers. Then I used a tape runner and adhered everything onto the card base. There you have it! A window card using the Partial Die-cutting technique!
Products Used:


No comments:
Post a Comment